|
This is the last installment of my kitchen reno mini series. Overall, this took way longer than I could adequately write about three years later, but the eleven months we worked on it were completely worth the effort. After spending the past week filling it with holiday baking and cooking, I still feel like this is the perfect kitchen for us and for the house. There were a lot of decisions we made over time to get this kitchen just right. Every detail was touched in some way, with only the walls and the kitchen faucet staying from the previous kitchen (and the faucet we added before we moved in). I already wrote about how the salvaged materials shaped the kitchen, but I didn't write about many of the other details that tie it all together. To catch up on the whole series, check out previous posts here: Part 1 | Part 2 | Part 3 | Part 4 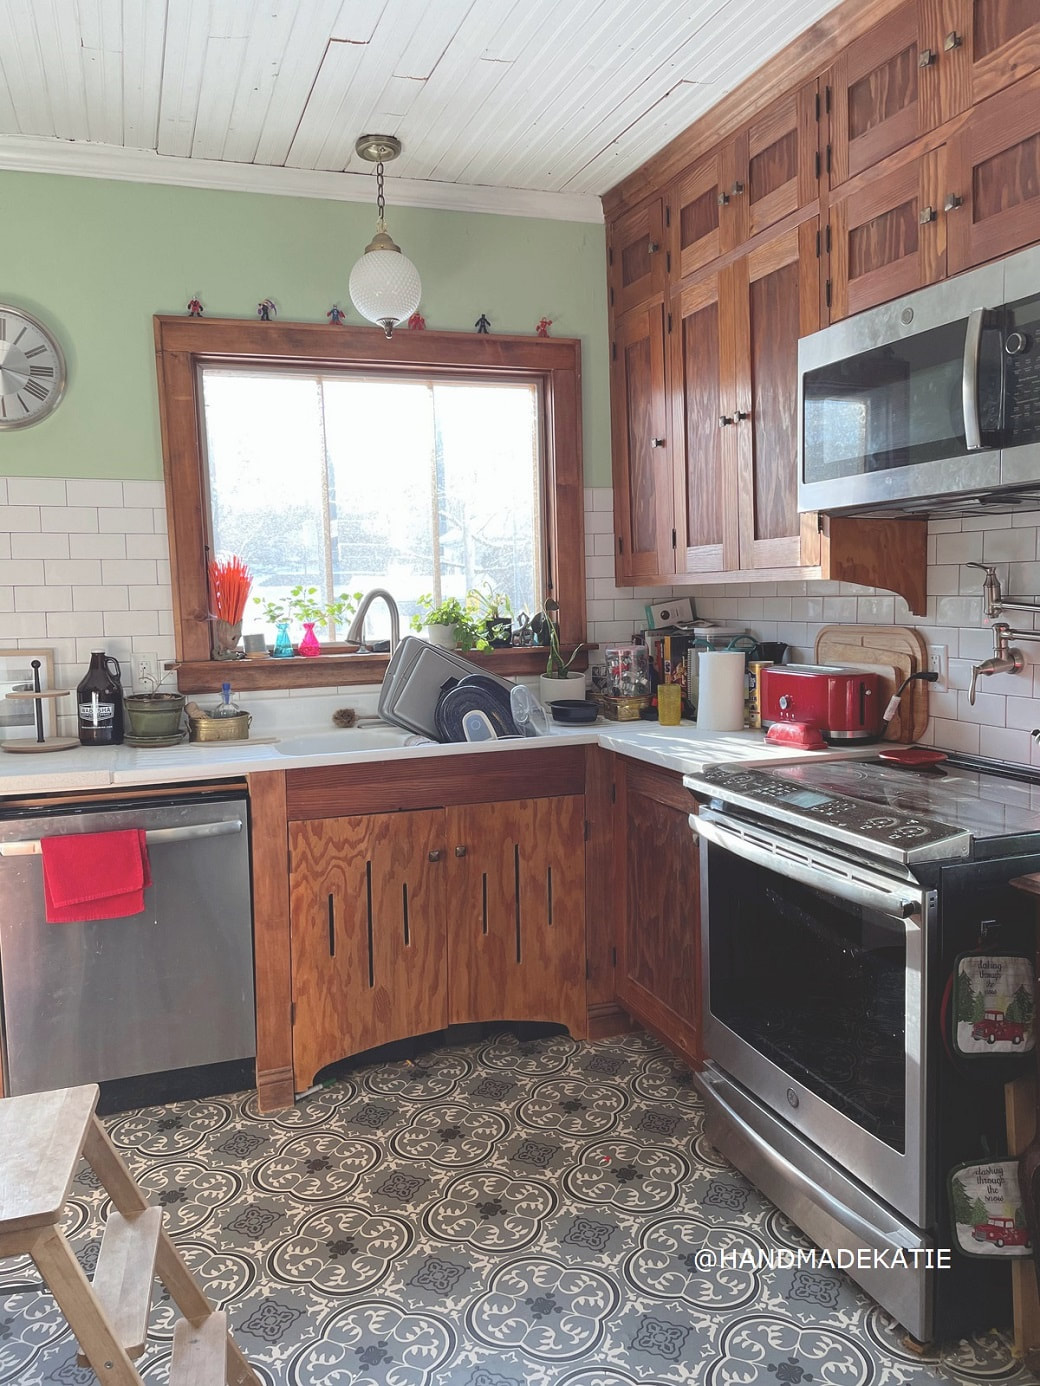
0 Comments
In building the cabinets for our kitchen, we divided the room into two halves. I first worked on the pantry side before tackling the the cooking side. That allowed me to always have a little bit of storage either through temporary pieces and the old upper cabinets or by moving things to the new cabinets after that half was done. It was logistically a lot to figure out, and we stored a lot in the basement too. I started in the corner pantry, adjusting my measurements to meet the *slightly taller* refrigerator that we had initially specified, and fitting the tallest pieces into place set me up for success for the rest of the kitchen. The room may not be square, level, or plum, but the cabinets are! The fine-tuning that went into getting the cabinets just right was a process that has helped me get a lot done in this house: from leveling bookshelves to getting basement spaces planned. Old houses require a different kind of creativity. Catch Up on the rest of this series here: Part 1 | Part 2 | Part 3 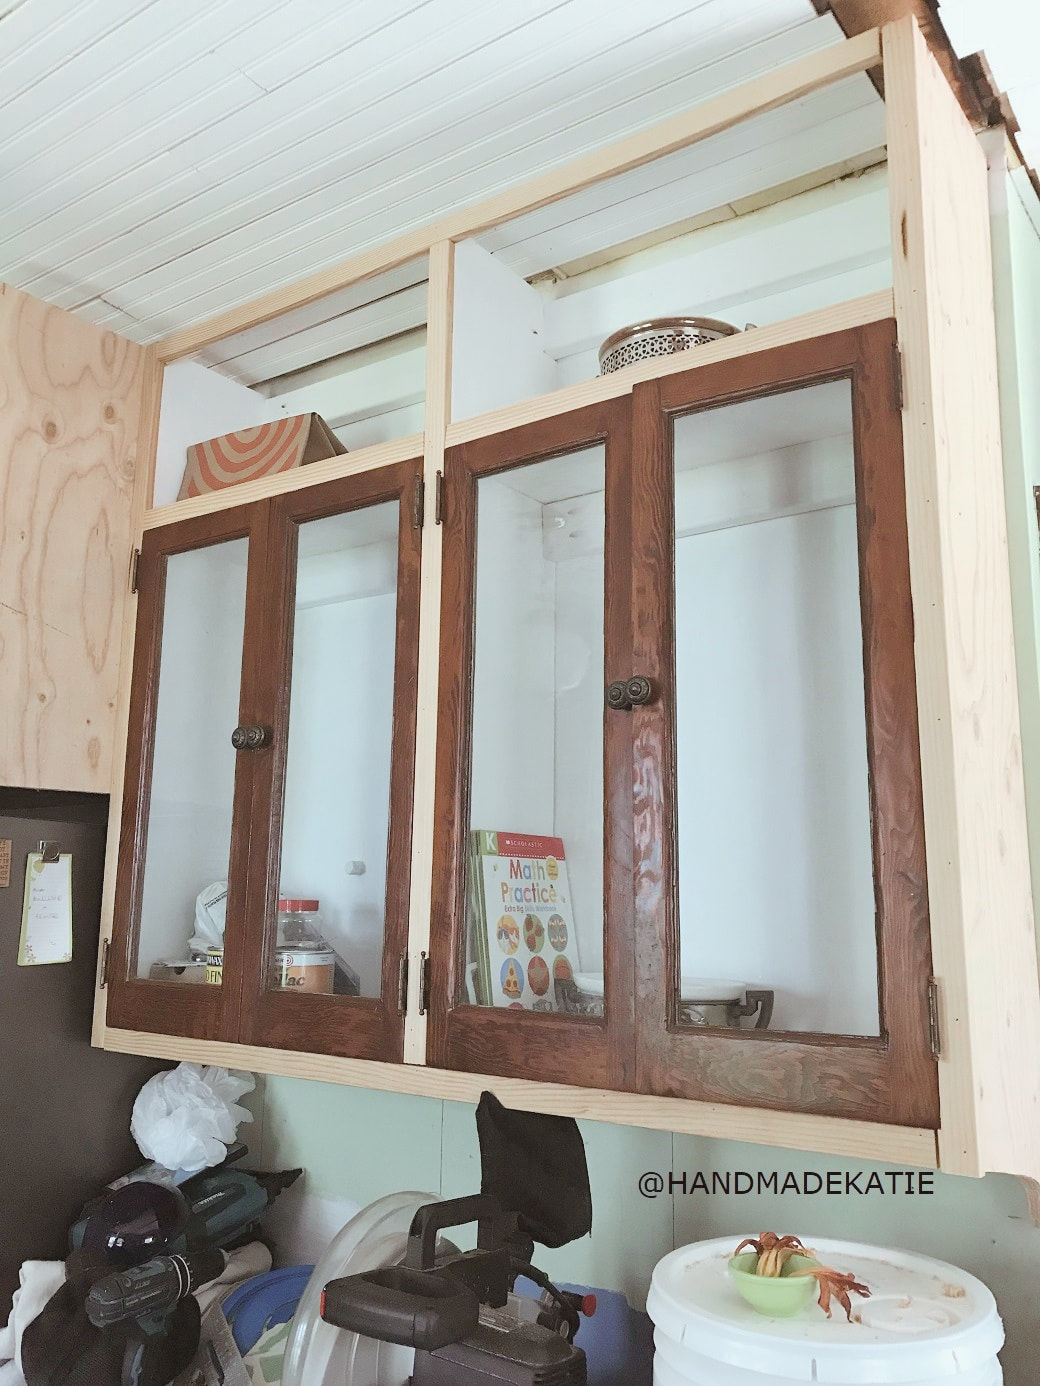 Arguably one of the riskiest decisions I made when designing our kitchen was the decision to build our cabinets on my own. A lot of the modern conveniences in cabinetry I decided to forgo to build them the "hard way." I built faces with inset doors, a kitchen sink cabinet with no toe-kick and scalloped doors, and full-size drawers made to fit without metal or wooden slides. This renovation was all about maximizing the storage capacity of the cabinets. After living with a poorly-configured kitchen for a long time, I had my priorities! I also knew it would make getting into some areas of the kitchen a bigger challenge for our young children, and I didn't mind some... natural child-proofing either. It's been helpful when the toddlers are exploring now! But I ultimately decided on this construction method because among our dressers, buffet, and myriad of antique furniture, not a single piece was modern construction. Soft-close drawers have never been a thing in the house, so I didn't see the need for them now. To catch up on how we landed on these designs, head to: Part 1 | Part 2 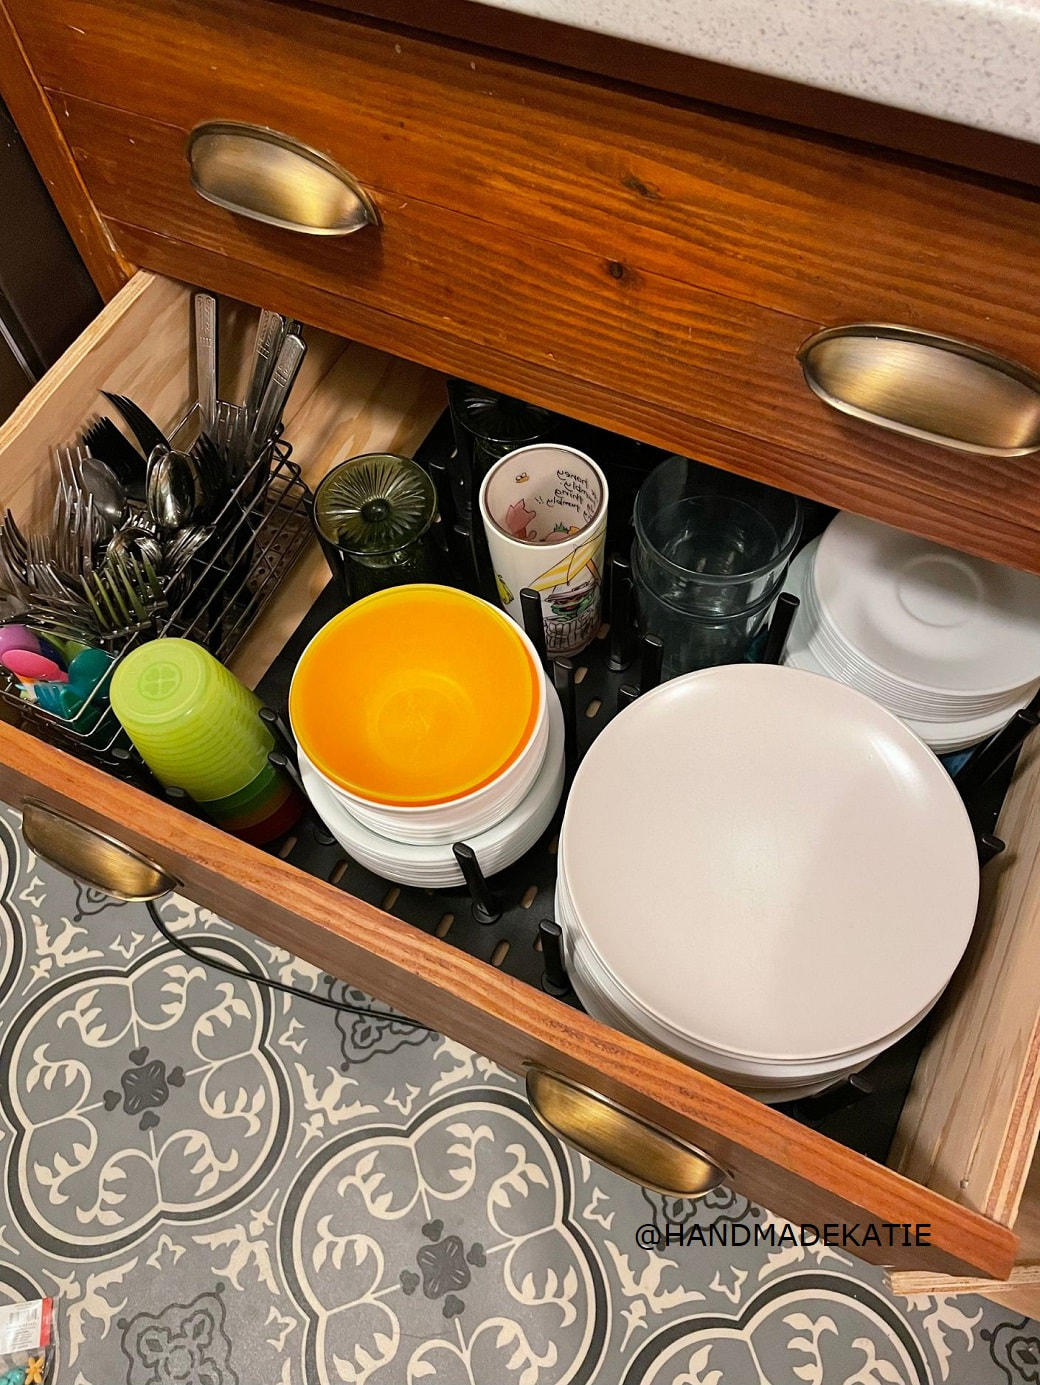 The design style of our kitchen could have gone a few different ways, and there were a lot of factors I considered when designing them. First, I knew I wanted wood cabinets. Since the kitchen is visible from the main living space, I wanted it to feel like it really went with the house, and while painted cabinets would have been period-appropriate, stained wood had been a mainstay in Minnesota no matter the decade. I also knew immediately that the cabinets needed to go all the way to the ceiling. I had a hard time thinking of a pre-war kitchen cabinet that didn't run all the way up. I also knew that the practicality of full-height cabinets would give us more practical storage and a lot less dusting. I never once questioned that. I also quickly landed on douglas fir as my wood-of-choice since -in 2019- I could easily source what I needed, and both the salvaged doors and existing original kitchen millwork were all fir. Like many bungalows, our fancy rooms have oak. When we planned our kitchen, there were a lot of things that helped me to make the final design. Beyond the salvaged pieces and original woodwork in our house, there are many available source documents through the national archives, Pinterest searches, and the old house community on Instagram. But I really leaned in to a few kitchens that were near and dear to my own experiences (and I wish I had more photos!). For more on where we started with the kitchen, check out Part 1 of the mini series. 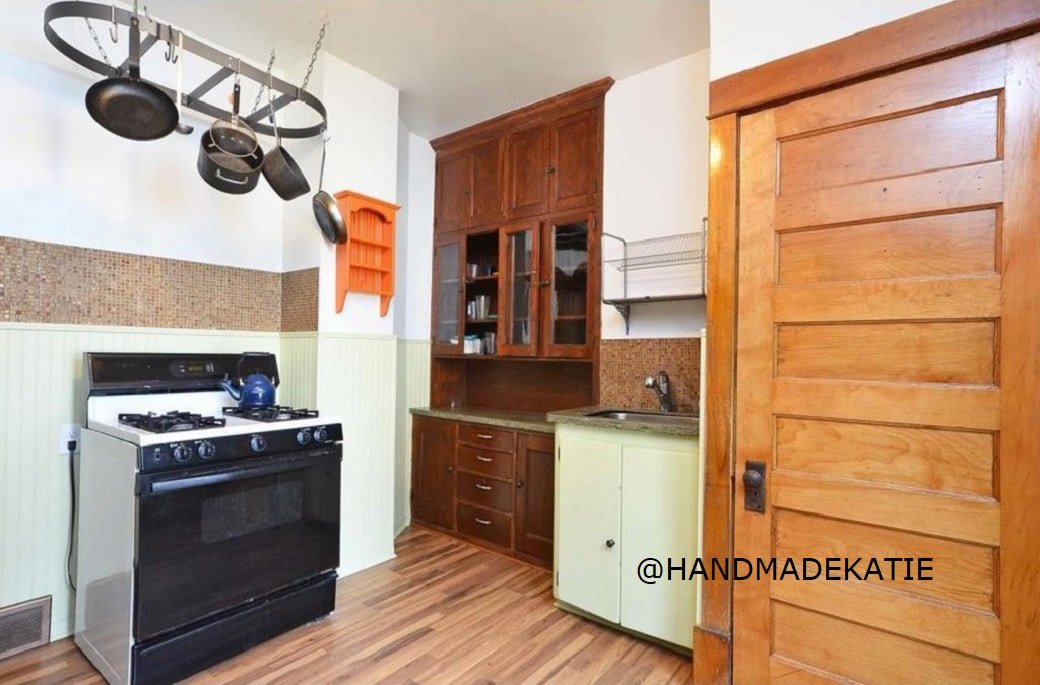 Three years ago, when I was in my writing hiatus and before my little kids were born, I gutted and renovated our kitchen with my husband and then-four and five-year-olds. Our kitchen was a disaster, with half of it over an unfinished, poorly sealed crawlspace. So, this became an area that we had to fix no matter what. The old kitchen had a lot of problems: there was a mouse-hotel under the cabinets with exits outside through the crawlspace, the kitchen plumbing froze in the winter, and the corner cabinet doors only opened about 5 inches wide. Like that corner cabinet, the storage was a mess. The fake oak MDF , broken counters, and weird obviously-fake brick really didn't fit this house. There was a lot that needed to happen, and half the battle was getting a plan together to figure out the best way to make it work for us. 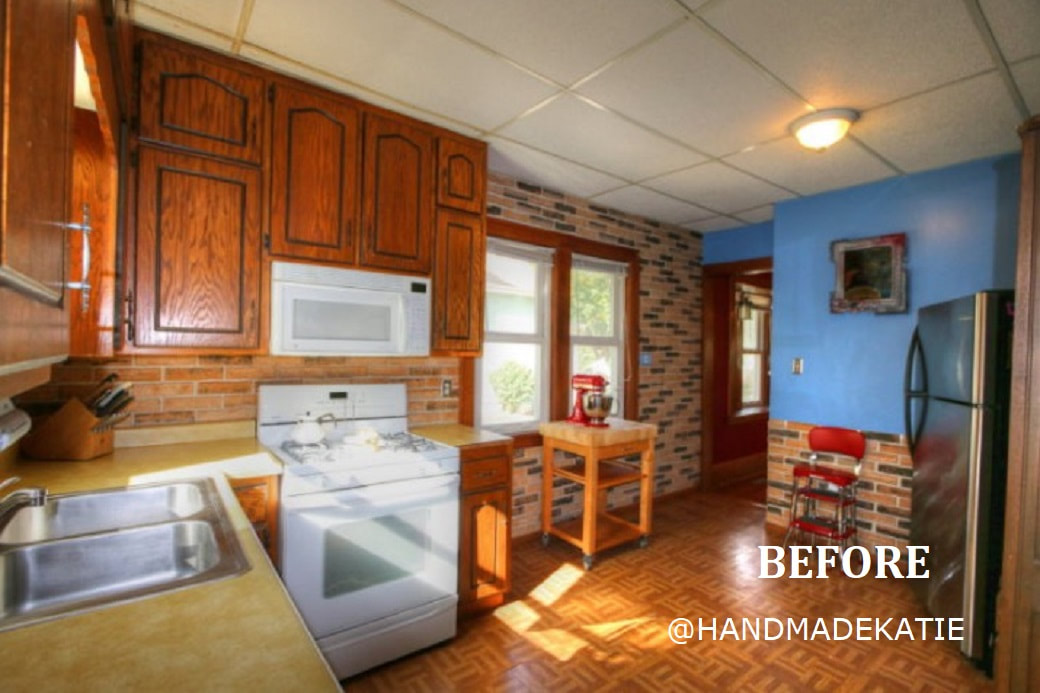 |
Katie SwansonI am a parent, creative spirit, and old house lover. My big passions are sustainable design and preservation. Bringing these together is key to moving existing homes into the future. * By subscribing to the monthly newsletter, you consent to receive links this month's blog posts and other relevant blog updates, a round up of things I love, and as a throwback to my DIY days, I may toss in an exclusive knit or crochet pattern of mine. Archives
May 2024
Categories
All
|
 RSS Feed