|
Once I had the pocket doors hung on the tracks, I had to make the actual pocket for the doors to slide into, and officially close this room back off to the rest of the basement. The side of the wall I completed is the side that sits inside the room. Since I’ll be demoing and reconfiguring for the library and the closet later, the other side will come then. For now, getting the room finished is top priority. With the doors hung and leveled, I used the doors themselves to really figure out exactly where the pocket needed to be for the doors to sit in their tracks just beyond the plate rail on the two side walls. I used my grandpa’s door jamb level to make sure the new wall was plumb, and mark exactly where the framing needed to be. 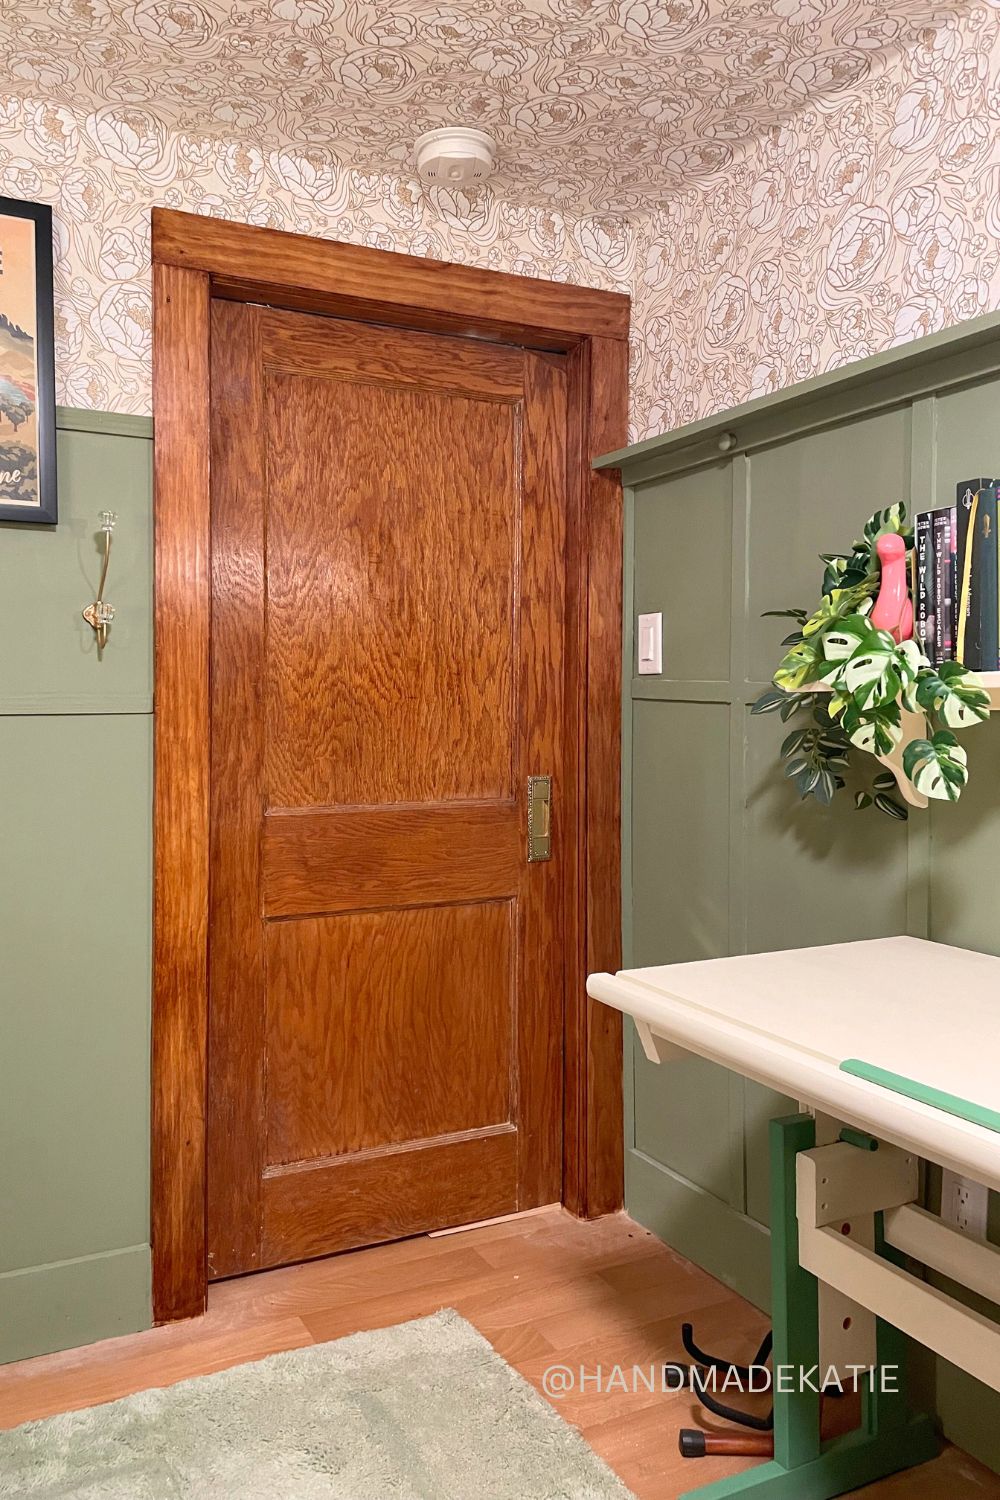 Framing the wall was quite simple. Since it’s so small and flat-studded, I built it in place instead of laying it flat, and I installed a top plate the full length of the wall to help conceal the metal sliding tracks and give the rest of the door framing a nailing flange. It made the most sense since I just pulled walls down to reuse as much lumber as I could from the walls that were in place, and in such a small room, I decided to add the sheetrock in small 2x2’ sections instead of opting for a full sheet. Mudding and taping was trickier, but it was worth it. 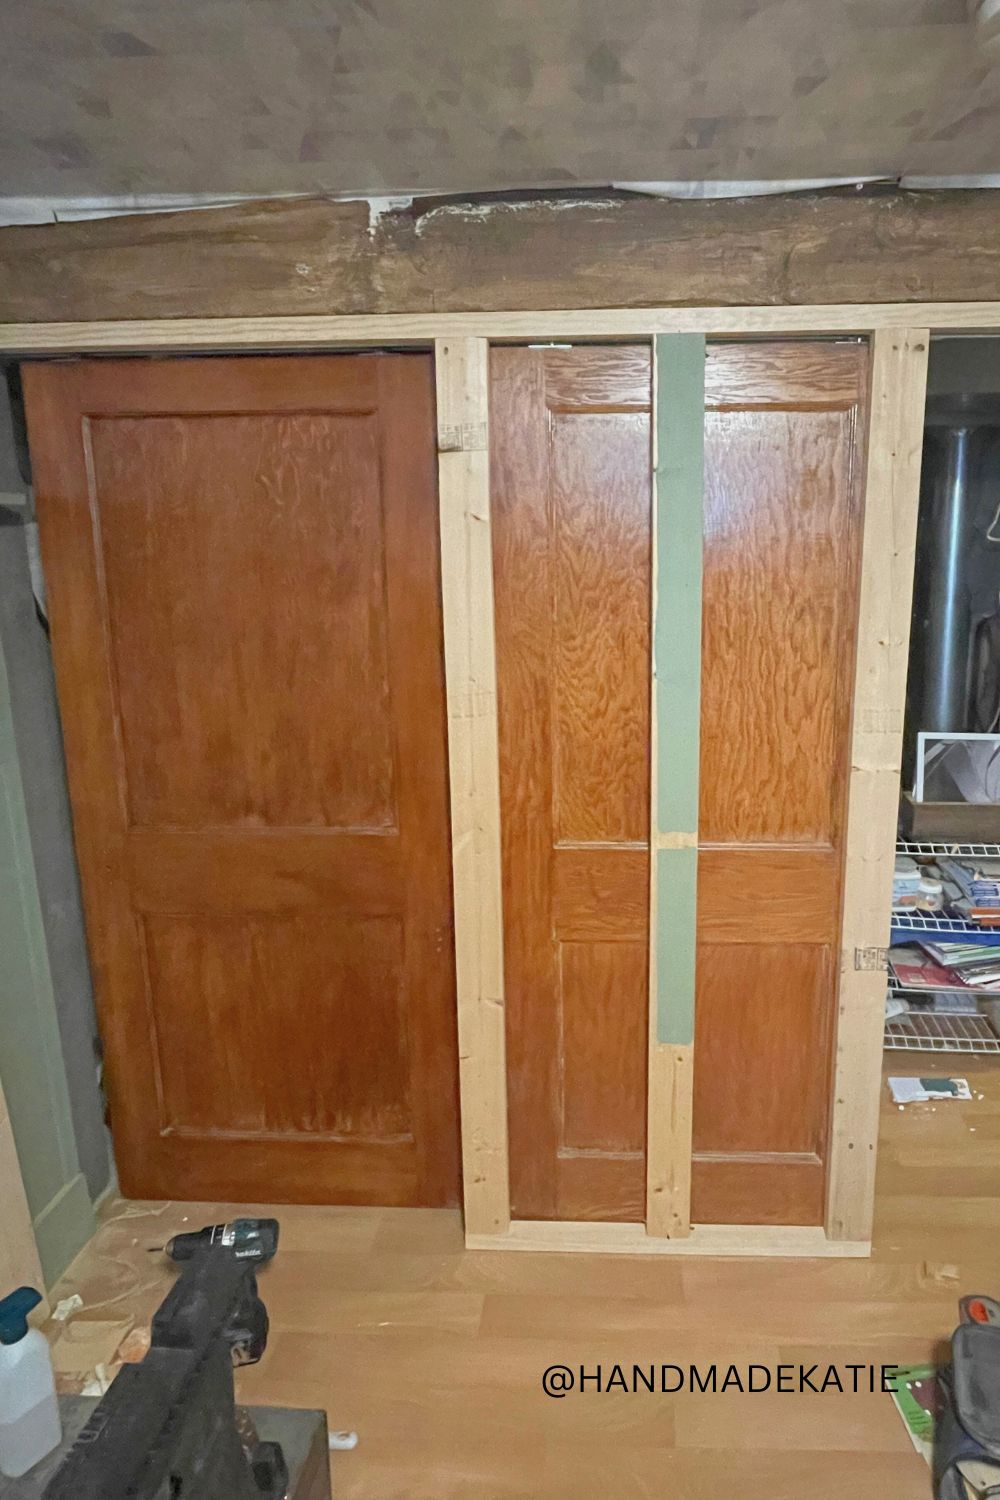 Mudding and TapingFor covering the seams and blending into the existing walls, I opted for Easy Sand 90: it has a much better finish and is generally easier to work with than pre-mixed, while still giving me working times that I can manage. I’m not the fastest taper, but also not the most patient waiting for joint compound to set. I have been mixing this in small batches, and I used FibaTape on the seams. It has a lot of the advantages of mesh tape, without needing the thickness to conceal it. It’s been my go-to for a little while now, and I can honestly say it’s my preference now. Then all it needed was prime, paint, and wallpaper before casings went in. 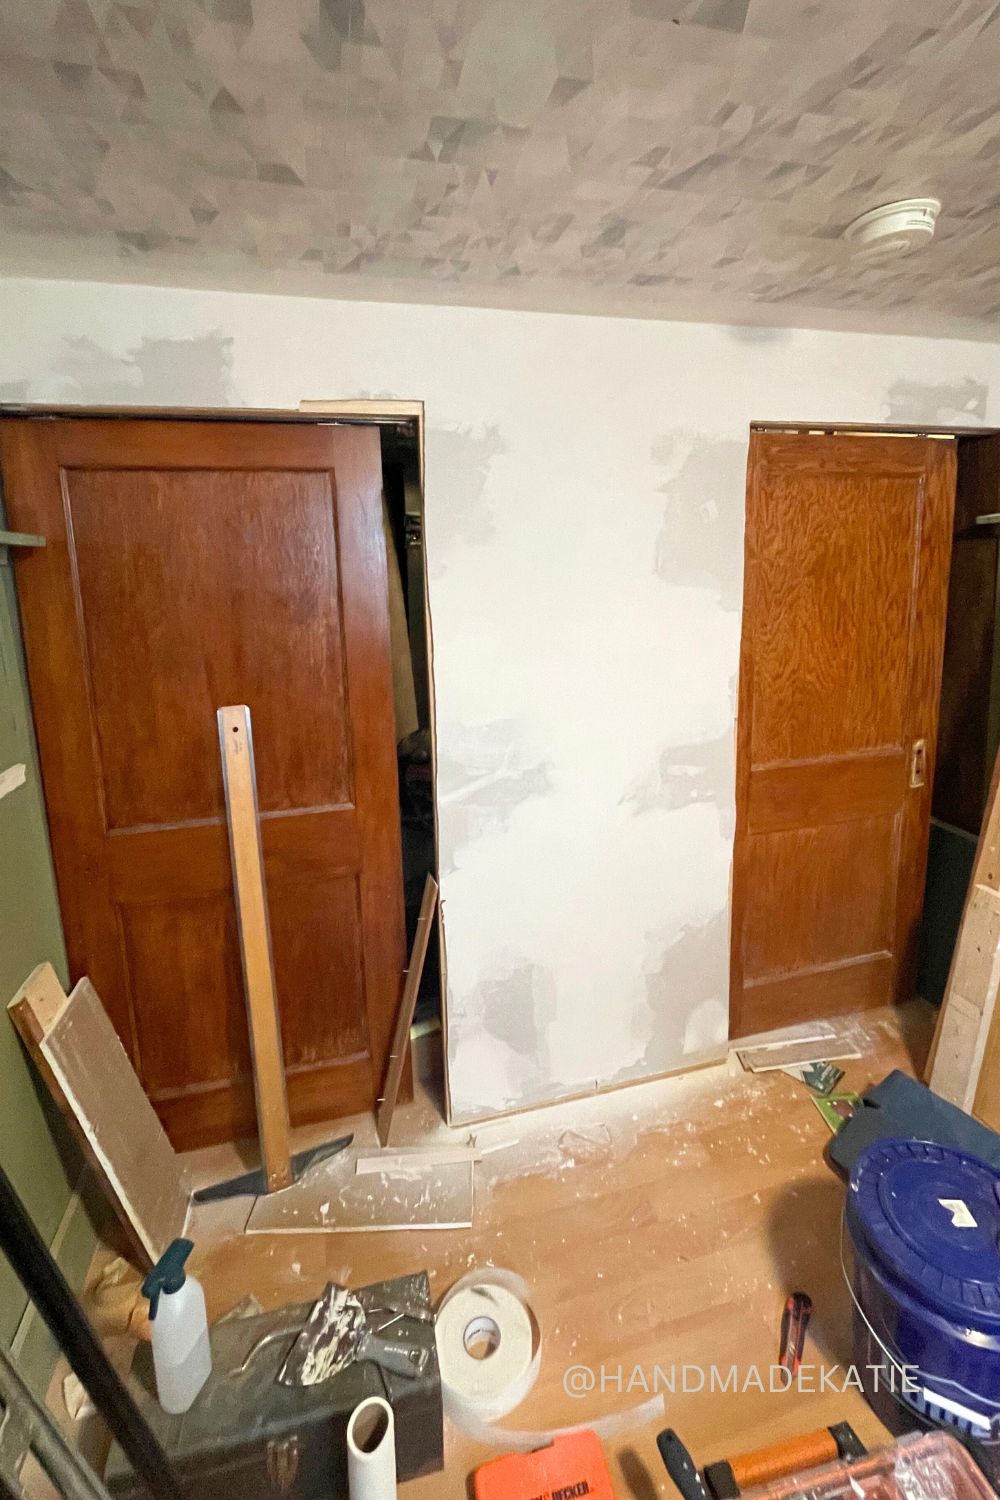 CasingsThe last big part of getting the wall in was finishing the door casings. Since these are track-hung, there aren’t jambs to work with in the way I typically would, and the stop has to be fairly deep on one side of each door. So, I used baseboard at full thickness on the deeper stops, and got to work with my band saw to rip down some for the more standard sized stops. It was a bit of a puzzle to retrofit, but I’m always up for a challenge. The casings in the basement rooms are all fairly simple, so I stuck with the same 1x4 flat stock that is used elsewhere, and I decided again to omit the back-banding found upstairs. Overall, I was able to make this wall feel like it was always part of this little room, even if the room has only been here a few years, and the wall is brand new. The stained woodwork on doors and window and door casings is a cohesive nod throughout the house that I will always love. 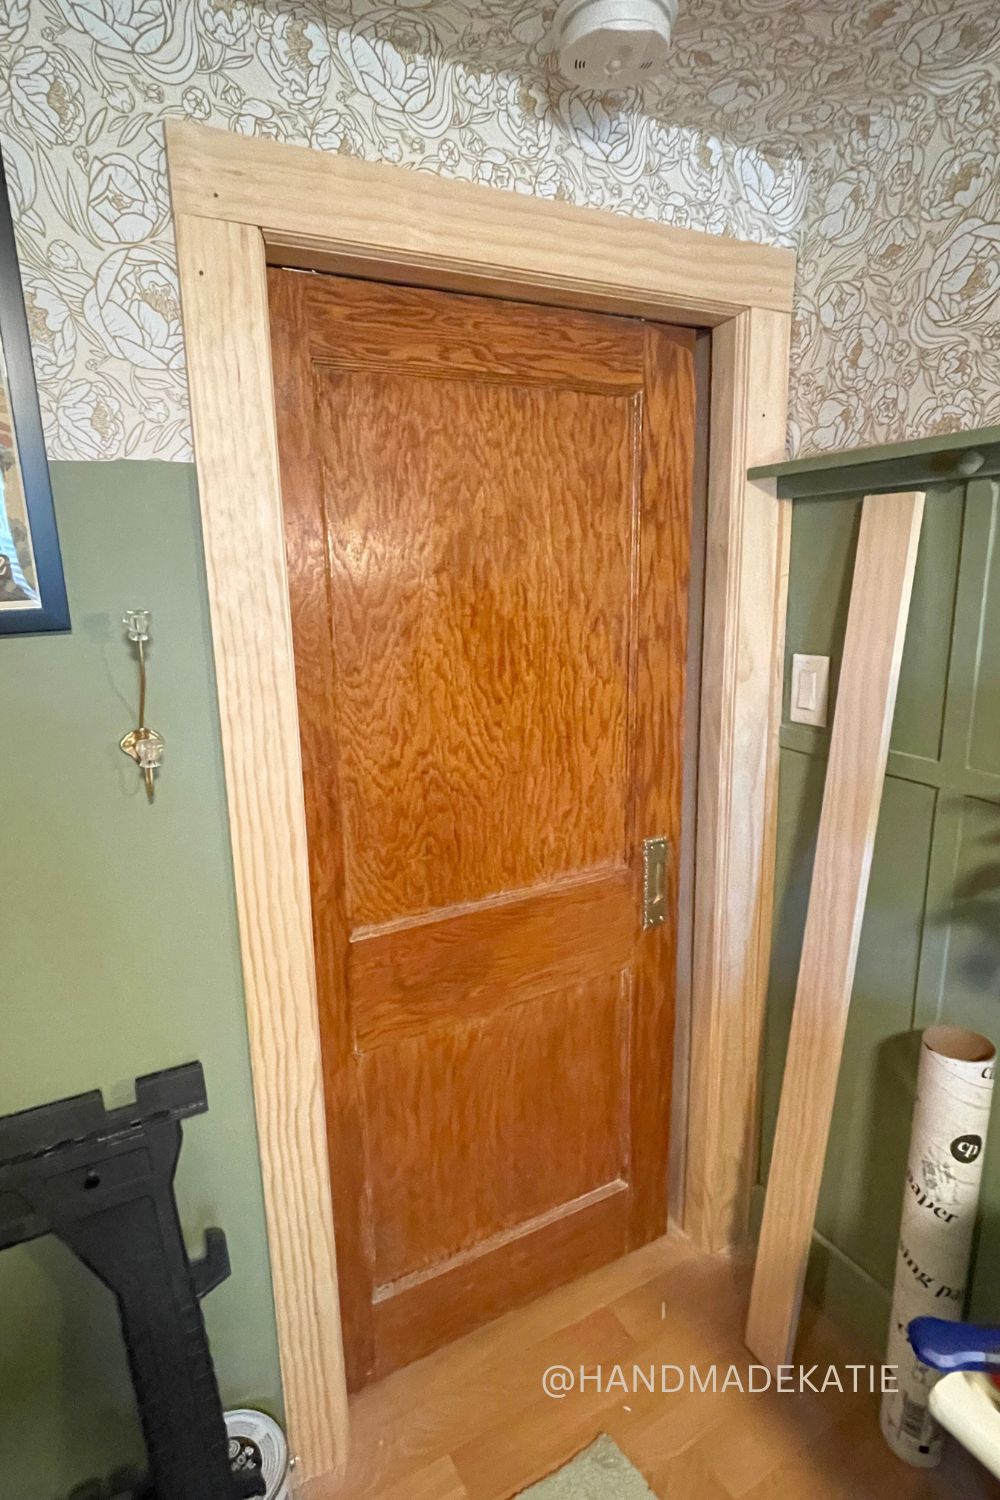
0 Comments
Leave a Reply. |
Katie SwansonI am a parent, creative spirit, and old house lover. My big passions are sustainable design and preservation. Bringing these together is key to moving existing homes into the future. * By subscribing to the monthly newsletter, you consent to receive links this month's blog posts and other relevant blog updates, a round up of things I love, and as a throwback to my DIY days, I may toss in an exclusive knit or crochet pattern of mine. Archives
May 2024
Categories
All
|
 RSS Feed